OpenSSL Creating a Certificate Authority (CA)
In this post we’ll look at how to create our own Certificate Authority (CA) using OpenSSL.
Generating a Private Key
The first step is to create a Private key for our certificate. We can choose either an RSA key or an Elliptic Curve key.
List OpenSSL Supported Elliptic Curves
The following command will display a list of supported OpenSSL elliptic curves. We’ll need to choose one of these curves when we are generating our Private key.
1
openssl ecparam -list_curves
Elliptic Curve Private Key
1
openssl ecparam -genkey -name secp384r1 -out ca.key
secp384r1is the name of the curve we are using.ca.keyis the name of the output file where we want to store the Private key.
RSA Private Key
The following command will generate a 2048-bit RSA key:
1
openssl genrsa -out ca.key
2048-bits is the standard size. A custom key size can be specified by giving an extra argument. The following command will generate a 4096-bit RSA key:
1
openssl genrsa -out ca.key 4096
Generating a Certificate
CA Configuration File
We need to specify some parameters for our CA before we can create it.
Create a file called ca.conf and add the following:
1
2
3
4
5
6
7
8
9
10
basicConstraints = CA:TRUE
keyUsage = cRLSign, keyCertSign
[req]
distinguished_name = req_distinguished_name
prompt = no
[req_distinguished_name]
C = AU
ST = Victoria
L = Melbourne
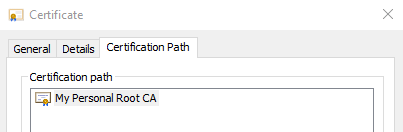
CN = My Personal Root CA
- Customize the
C,ST,LandCNto your desired values.
The CN (Common Name) field will be displayed when your computer shows the certificate path:
Creating the Certificate
We are now ready to create the certificate using the private key and config:
1
openssl req -x509 -new -sha512 -nodes -key ca.key -days 7307 -out ca.crt -config ca.conf
-x509output a Certificate instead of a Certificate Signing Request (CSR).-sha512specifies the hash function that will be used to sign the certificate. Other values may be used here such assha256andsha384.-nodesmeans the certificate should be unencrypted.-key ca.keyspecifies the Private Key we are signing this with.-days 7307specifies the number of days the certificate is valid for. 7307 days ≈ 20 years.-out ca.crtspecifies the output file name.-config ca.confspecifies the configuration file we wish to use.
Using the CA
Now that we have our own Certificate Authority, we can use it sign certificates for web-servers so they can use TLS. I have a guide to do this here.
If we want to use the CA and not have certificate warnings, then it will have to be installed as a Trusted Root CA on your computer/browser.